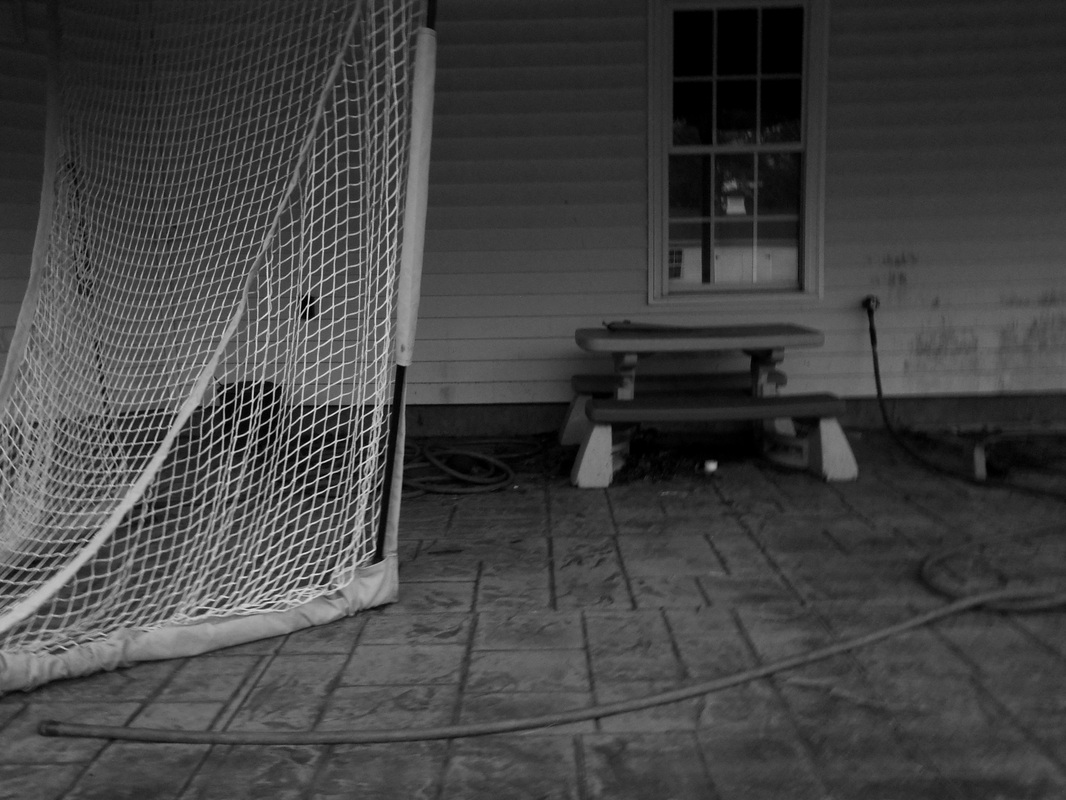
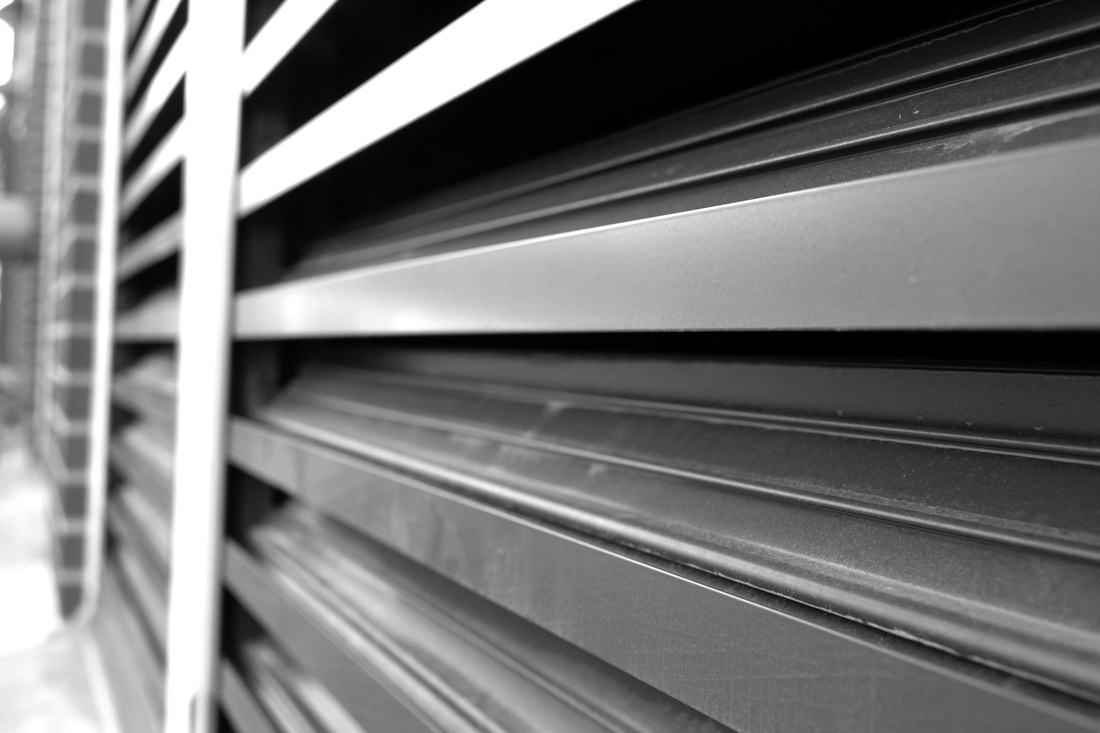
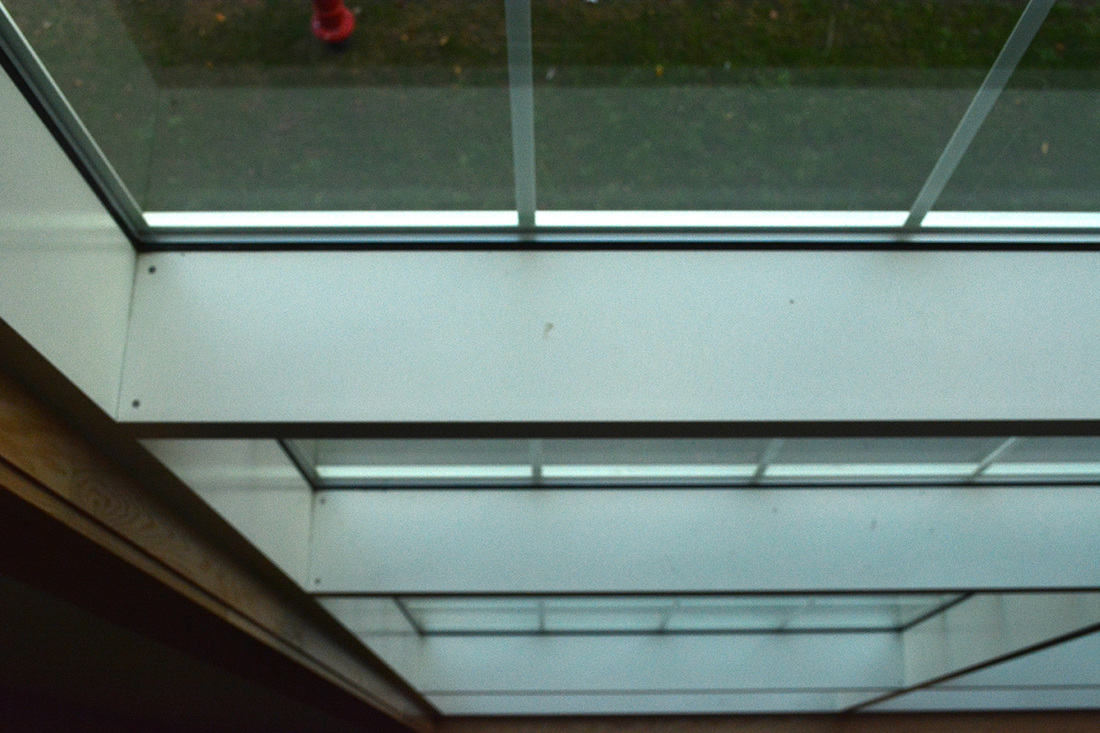
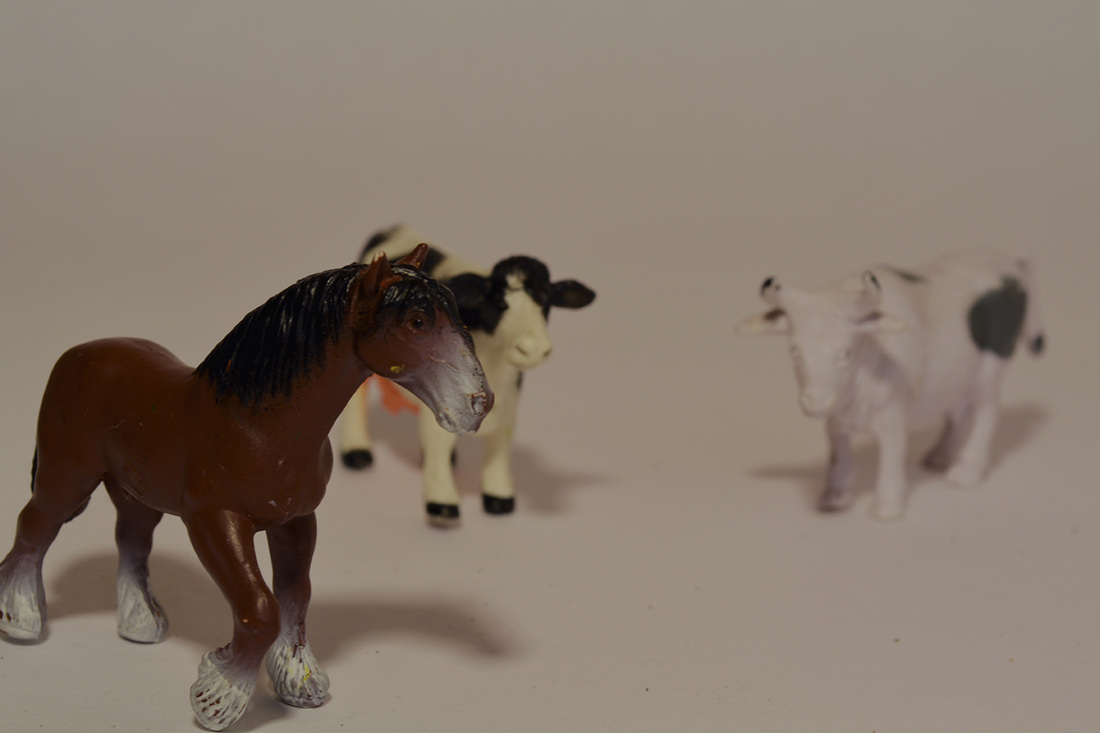
Line and Shape: Black and White
Reflection: Line and Shape
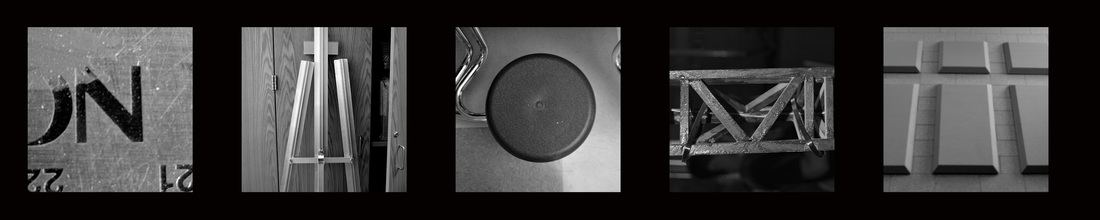
I chose to take most of my photos outside and some inside. I took some outside because the outdoors has an endless possibility of what you want to capture. But, the indoors had all kinds of shaped and sizes that aren't outside. Two out of the three outdoor photos focus around more of lines than shape. Two out of the three indoor photos are more focused on shape rather than line. I wanted to see in comparison how photos of lines and shape differ from indoor to outdoor.
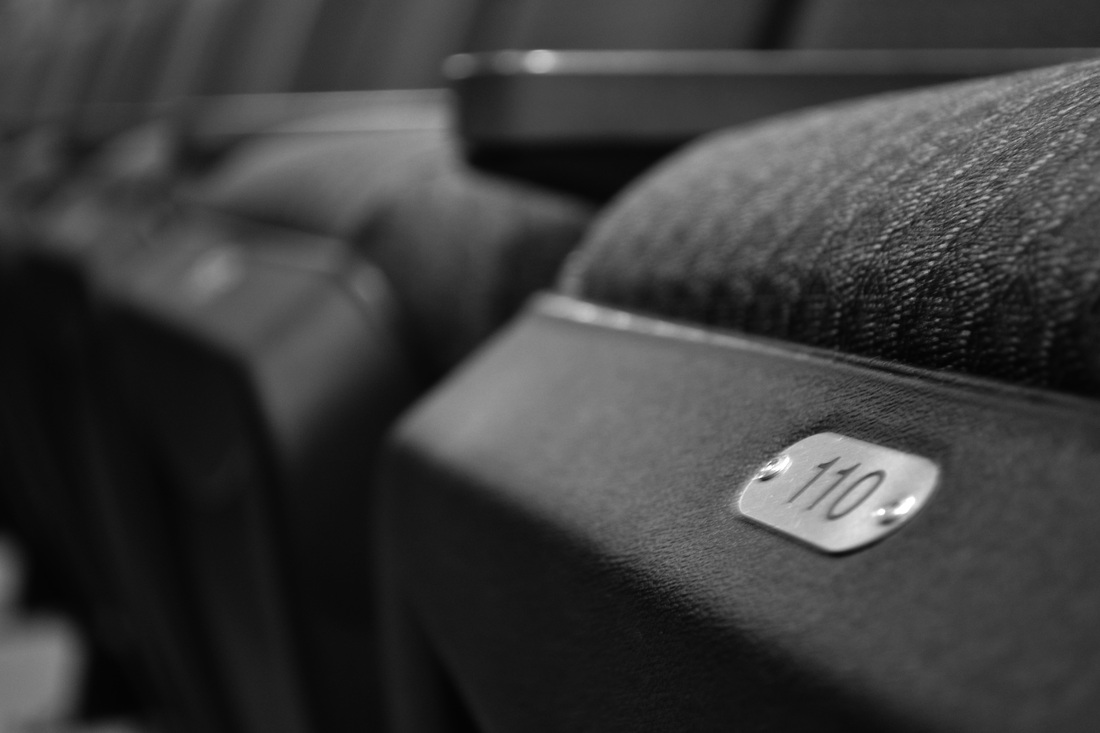
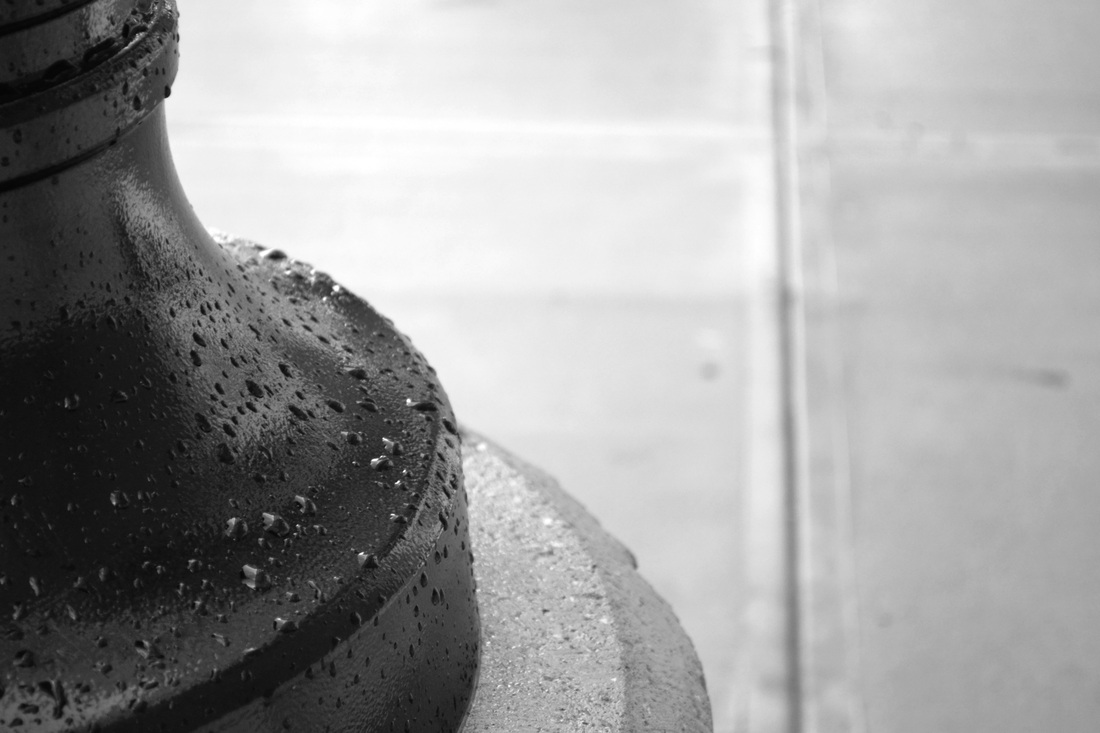
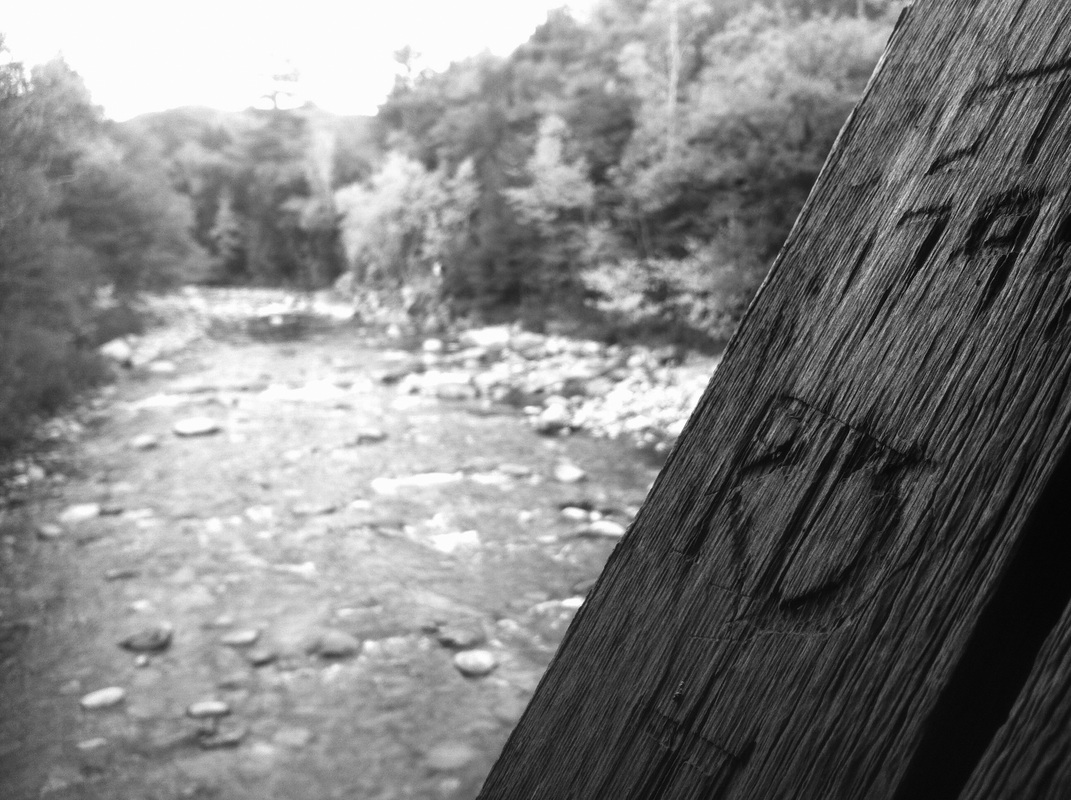
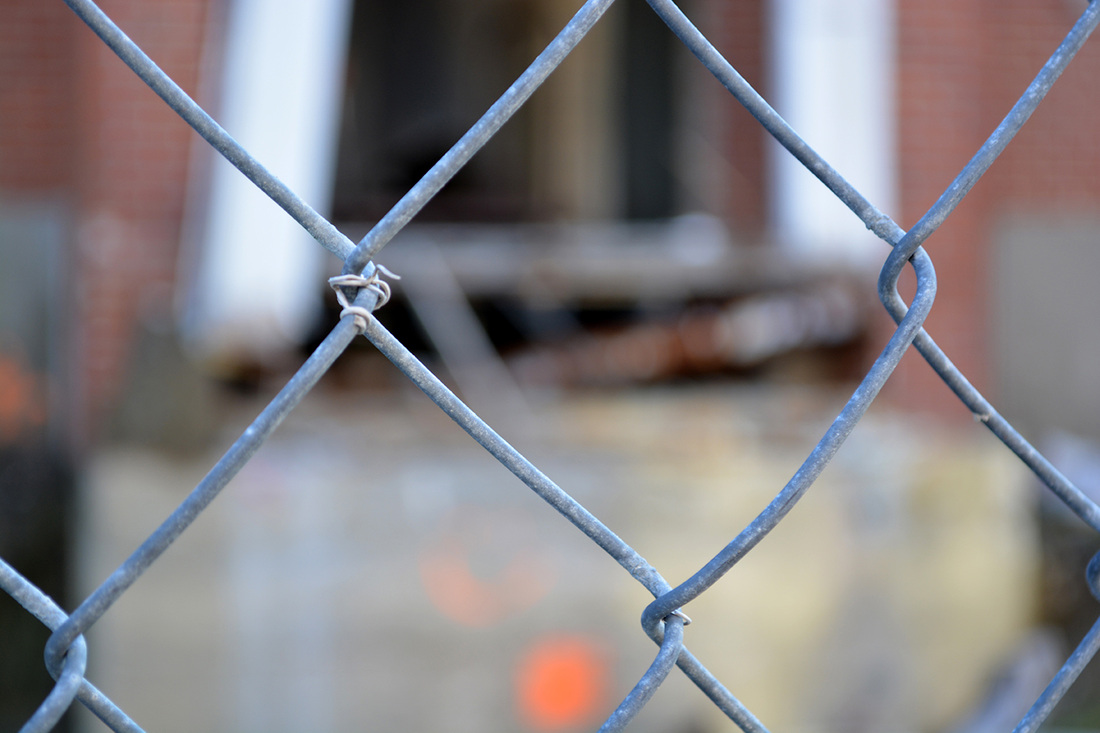
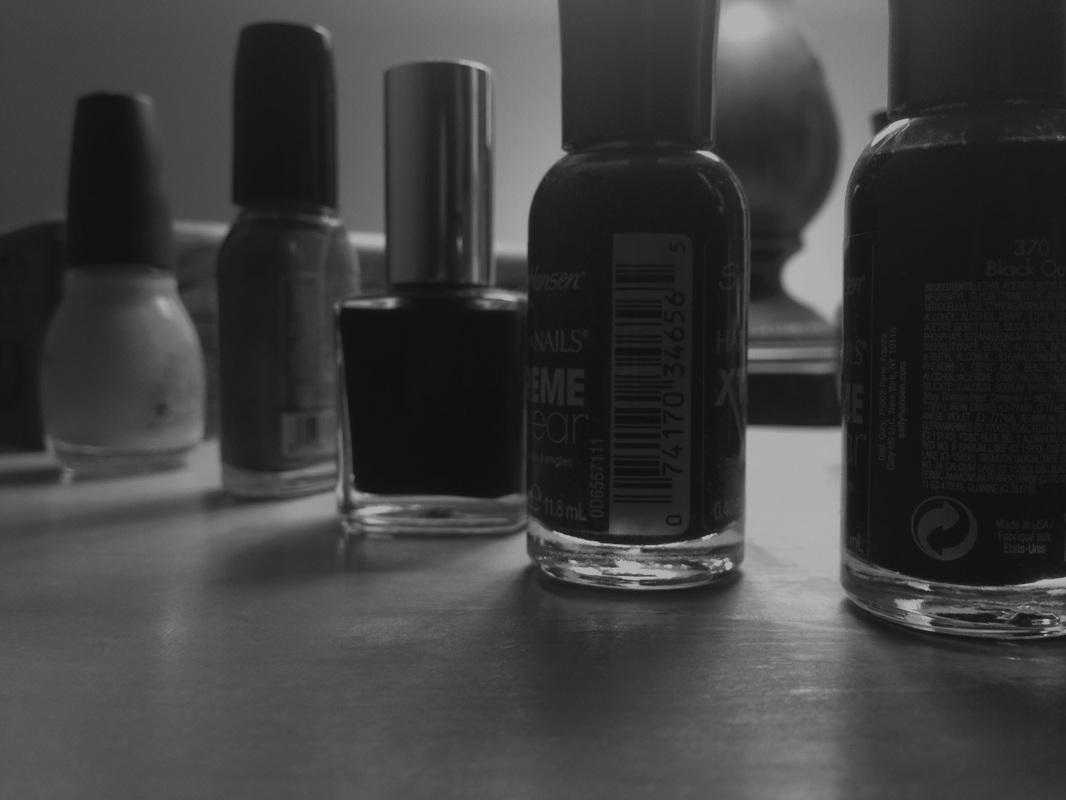
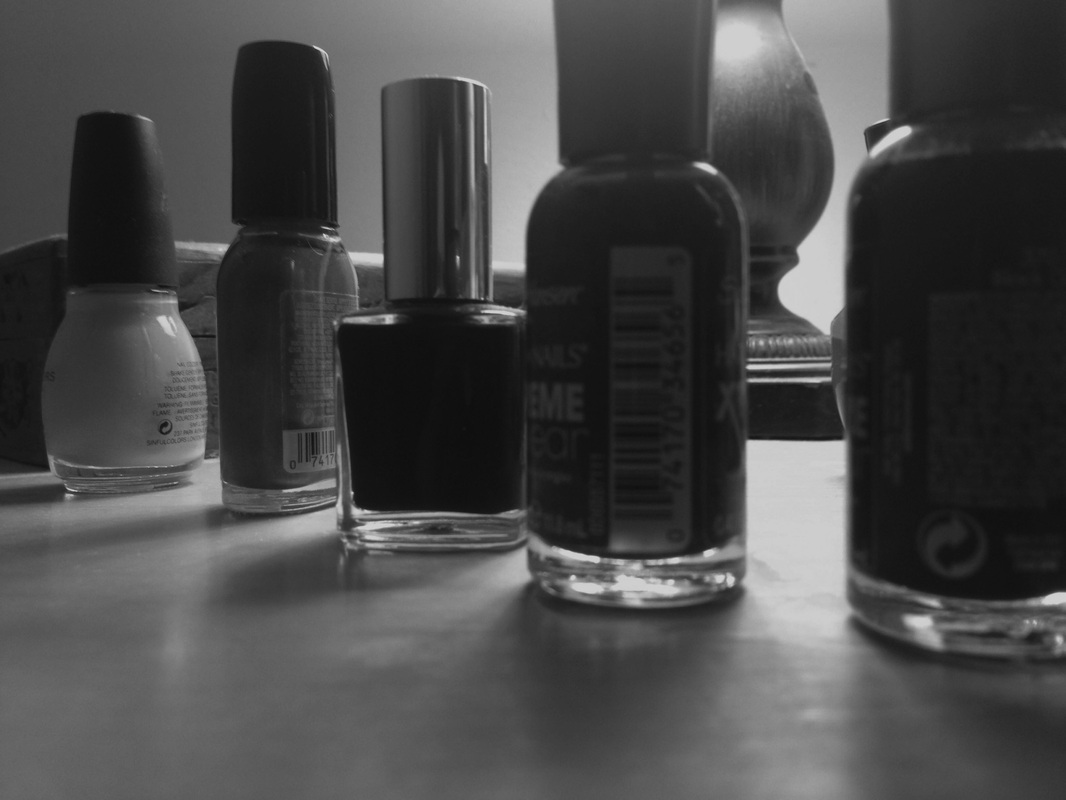
Pattern and Texture: Black and White

Reflection: Pattern and Texture
I decided to take most of my photos outside, rather than inside. All of my photos were taken up close and horizontal. I took them all up close because I wanted to get the up-close detailing of everything I was taking photos of. My first photo shown is my favorite photo. That photo was taken inside, in the Performing Arts Center. I took it up close so that you can see the texture and the pattern of the seat. I took it horizontally so that the effect of the other seats in the background would become blurry. I think my photo somewhat goes be the rule of thirds by how the seat number is far to the right. This photo for sure had pattern and texture in it by being up close of the fabric of the seat and the plastic of the seat.
When observing my photos, I feel as if my first photo of the seat in the Performing Arts Center in underexposed by how it is very dark. I also feel as if my photo from outside that's focused on the rain drops is overexposed. It may be too bright, but I feel that the post that the rain drops are on balances out the light and dark photos. I feel the best photo that has an even balance of dark and lights is probably my photos from New Hampshire. Those photos are the second and fifth photo. The second photo has a good balance of lights and dark's, but it may be a little too dark to have an even balance. In the fifth photo, the photo focuses on the wood beam with the engravings of letters and numbers. The photo had a dark balance of the beam, but outside where the river and the trees are have a good light balance, balancing out the dark and lights in the photo.
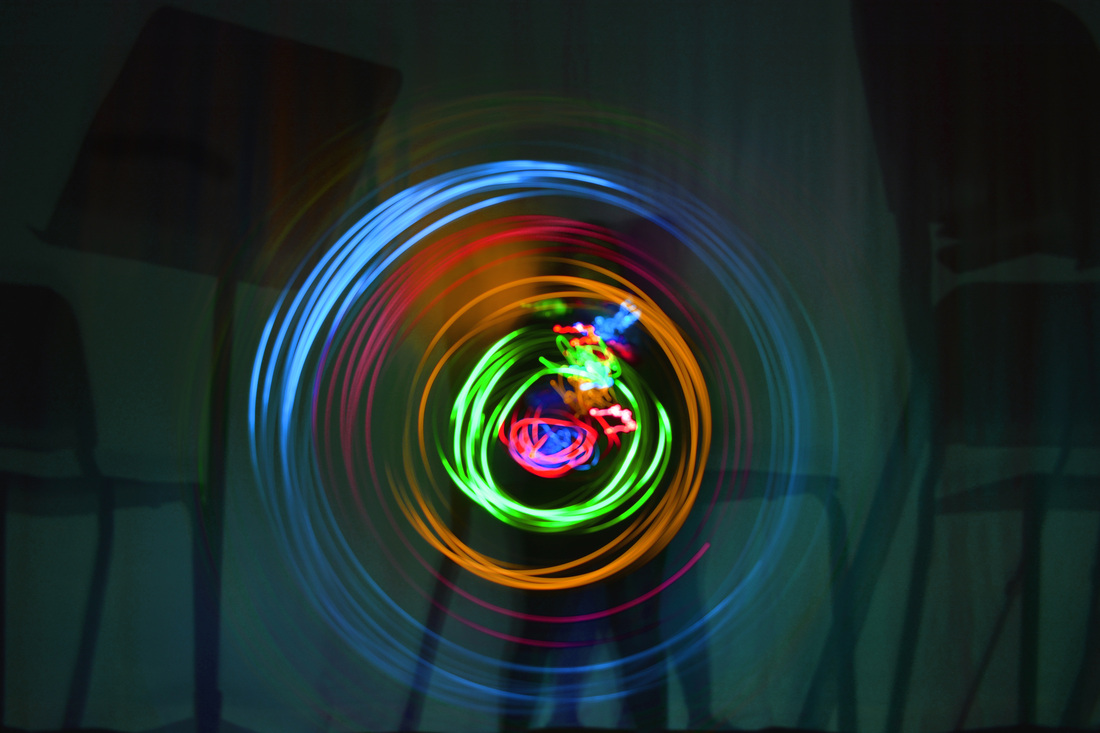
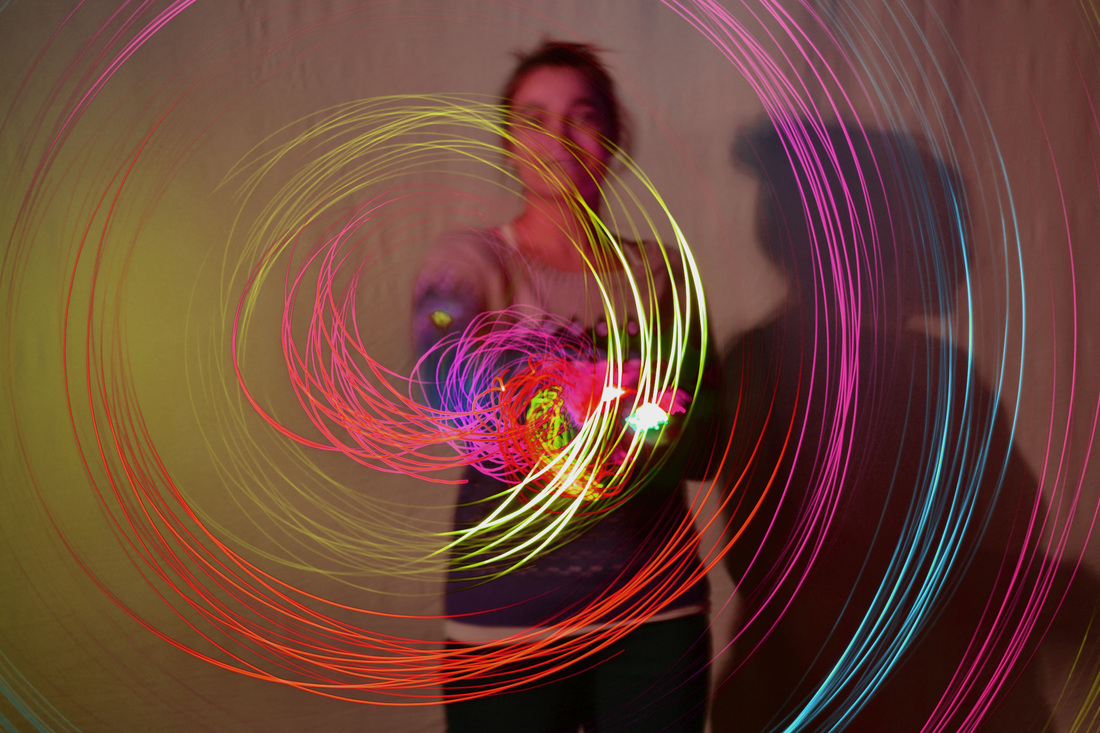
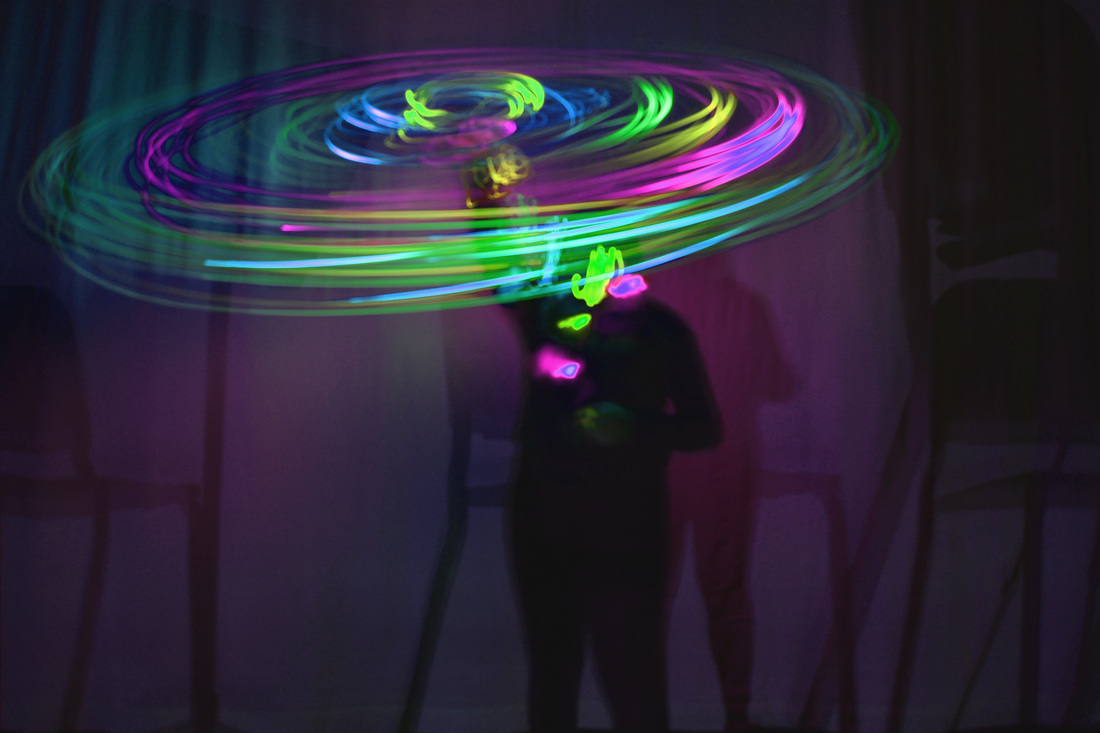
Painting With Light:


Reflection: Painting With Light
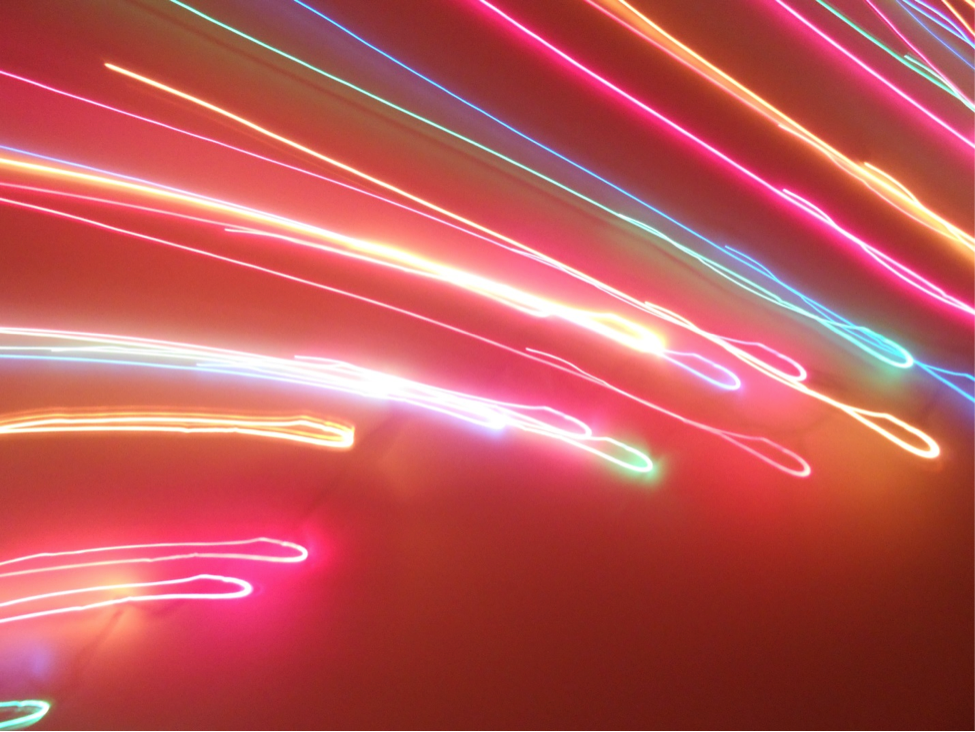
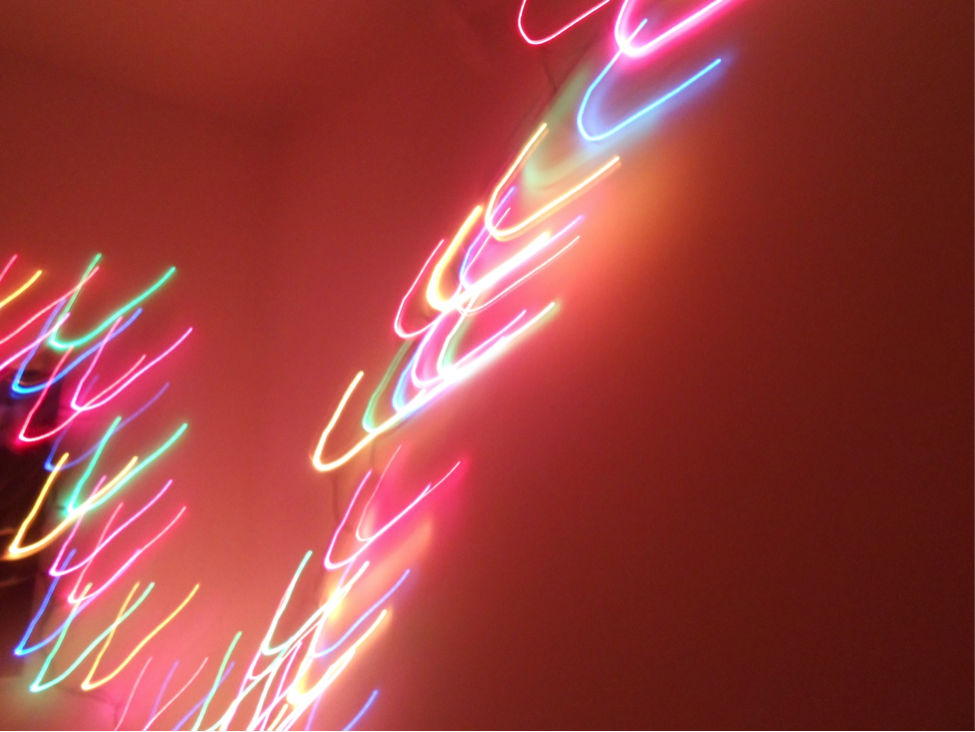
When taking the photos for Painting With Light, it was challenging, but fun at the same time. The first photo shown is a circle of different colored lights. To create this photo, there were some holiday lights that my partner and I spun around. The shutter speed for the photo was 6". The other photos shutter speed ranged from 10" - 4", depending on what we were going to do, such as spinning around lights to writing out words and pictures. For creating light sources, there was some individual lights that we were able to use and we also use some string holiday lights. (slow motion)
Fast Motion:
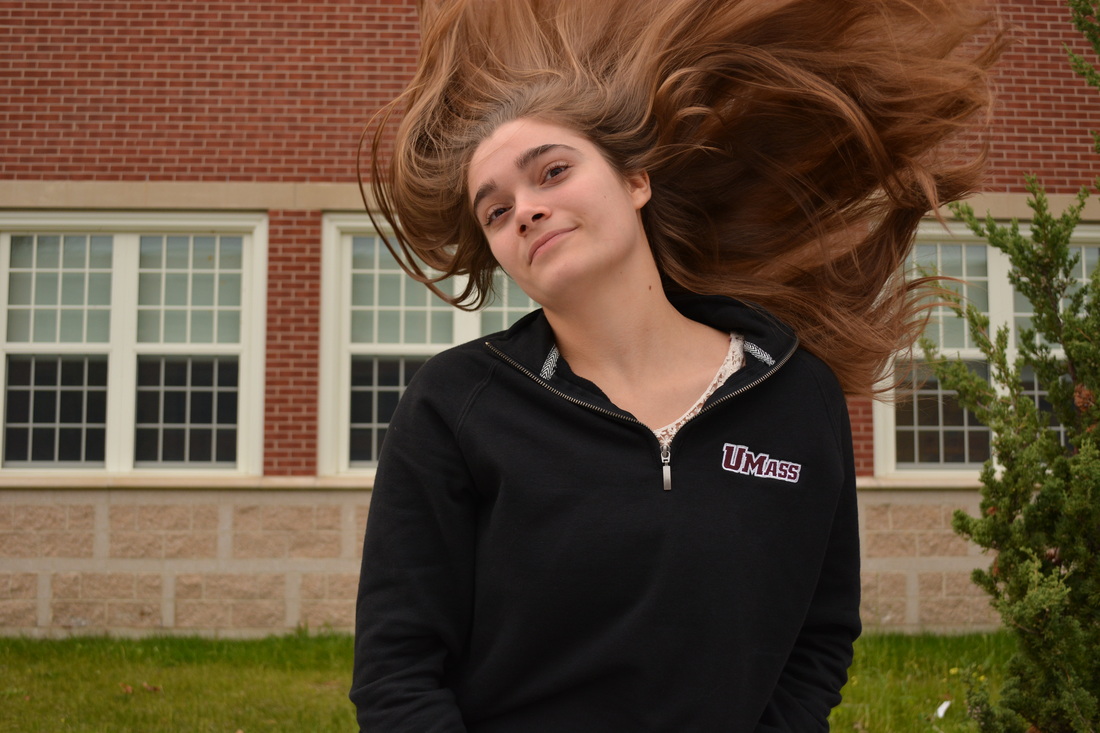
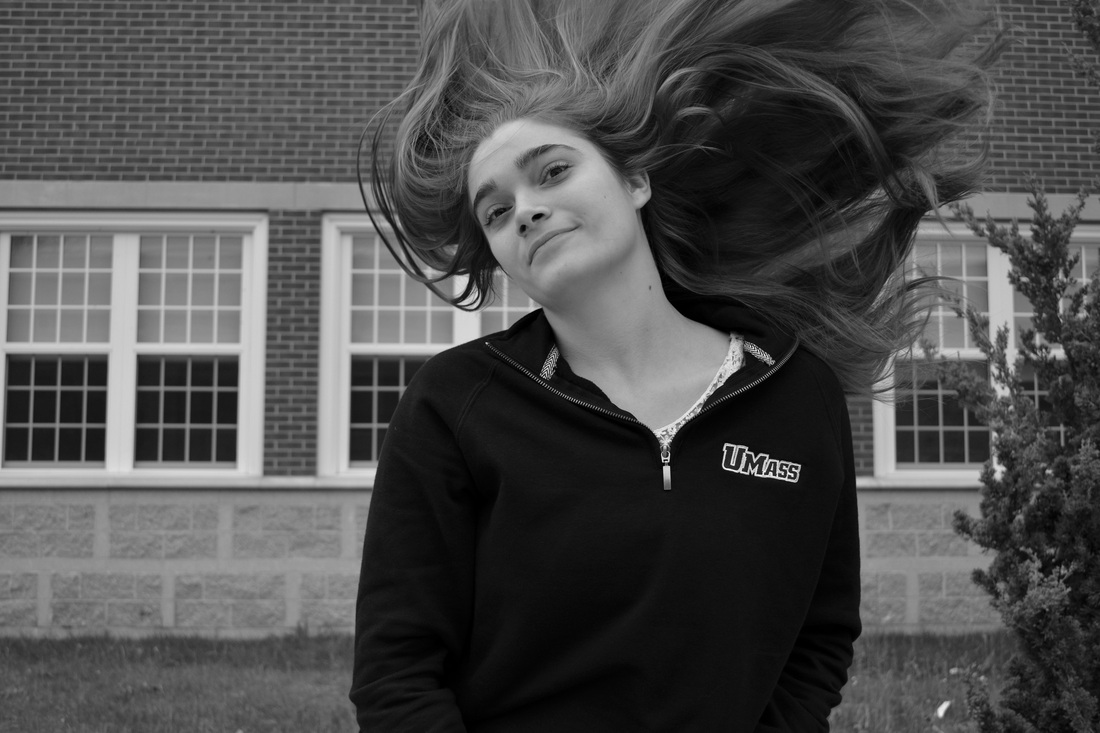
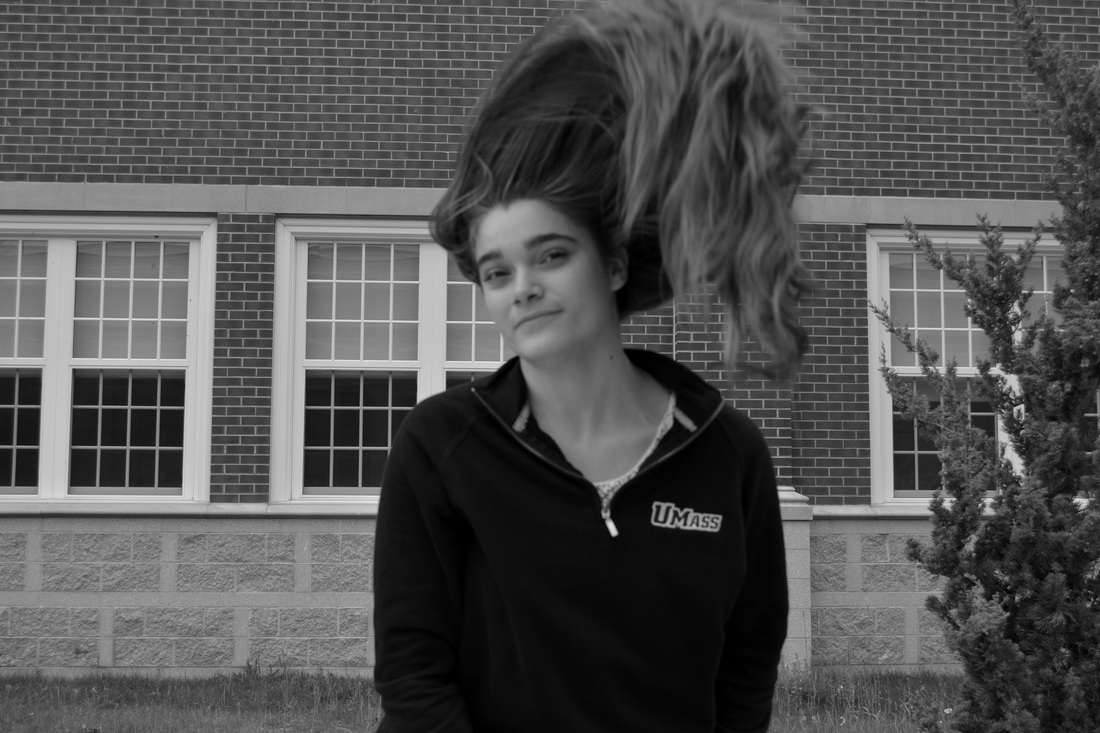
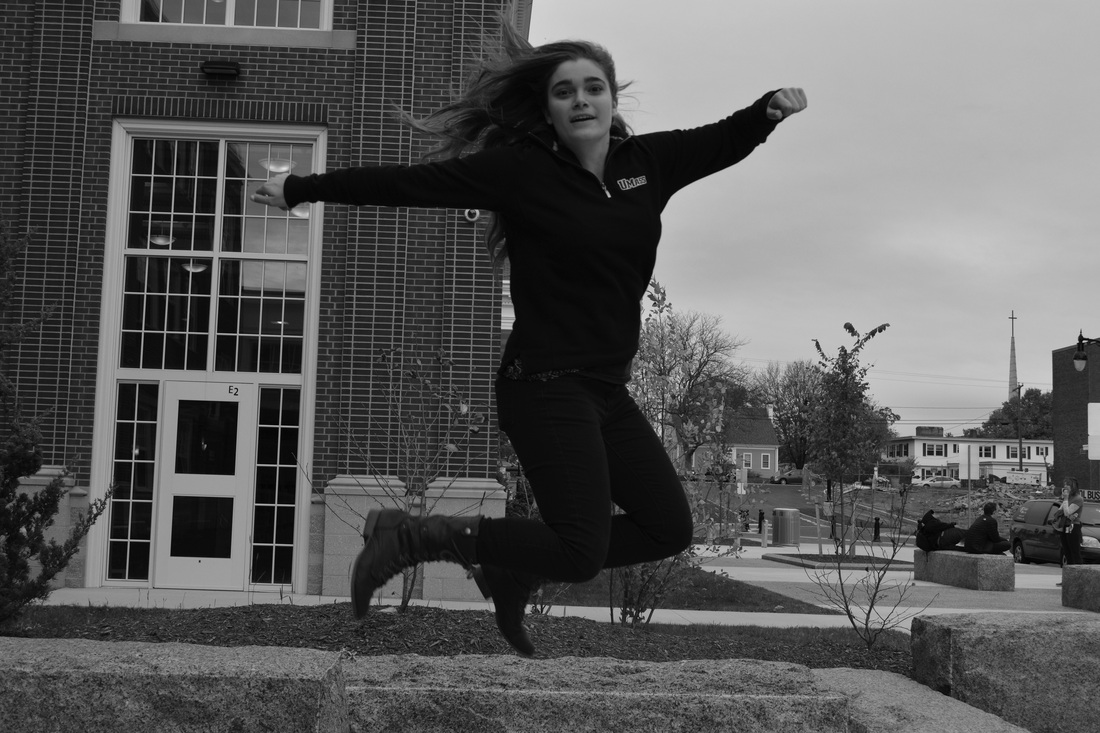
Reflection: Fast Motion
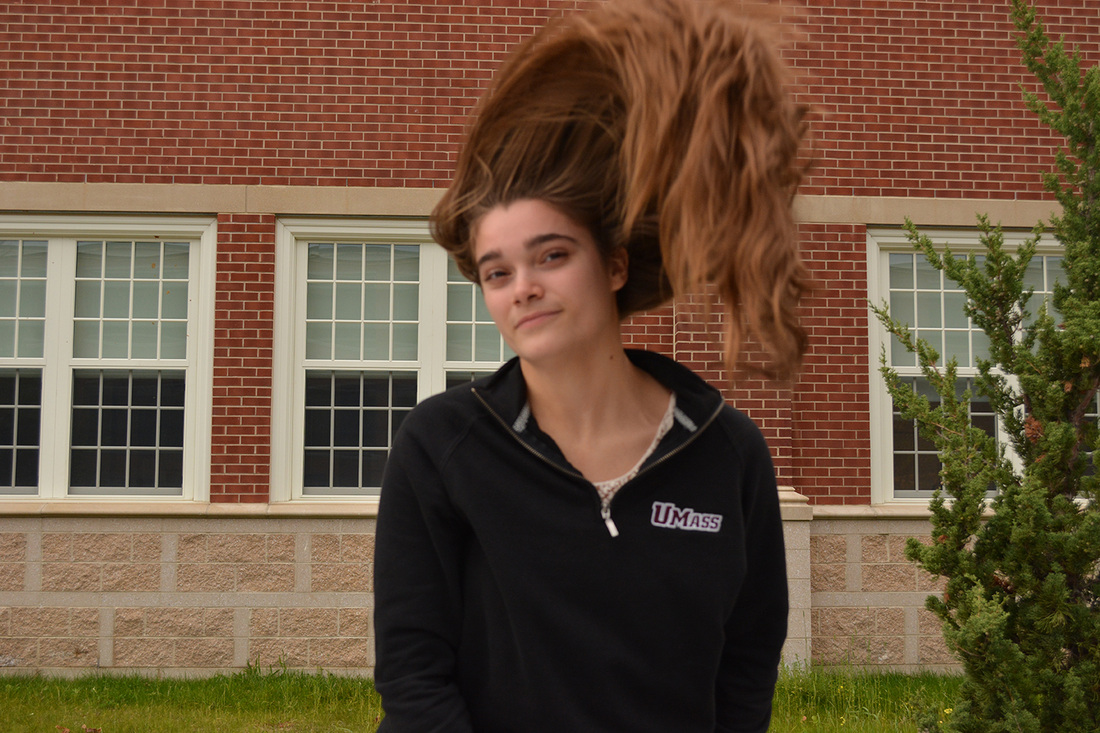
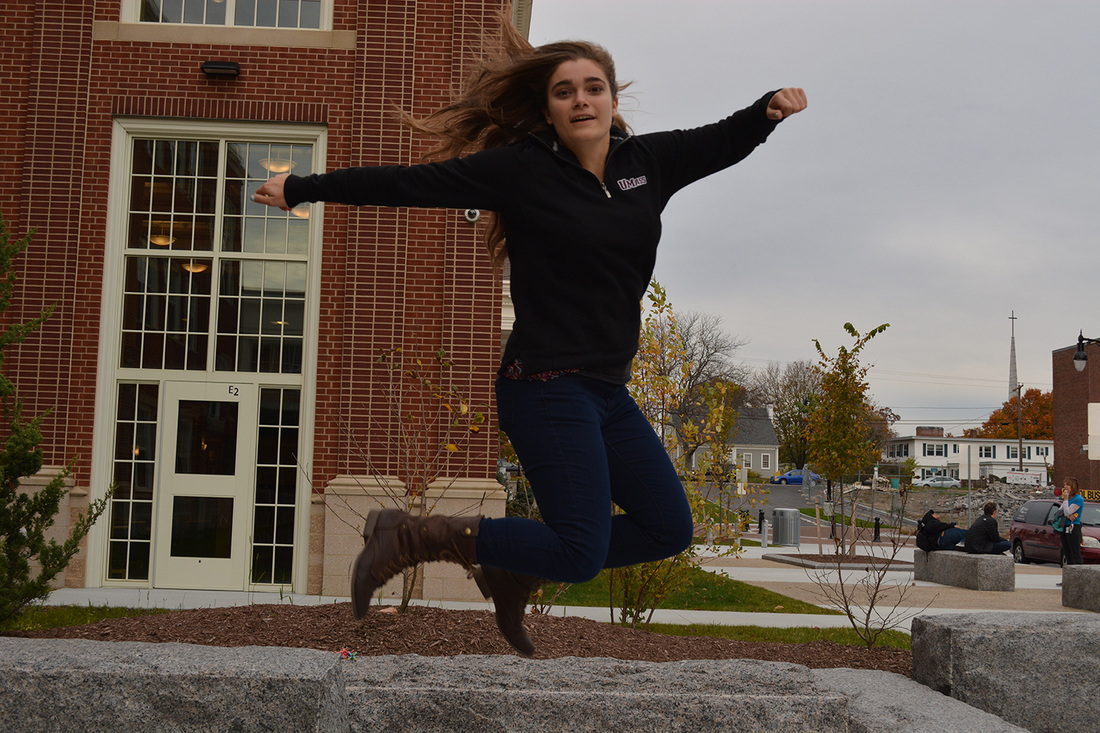
When taking these fast motion pictures, the shutter speed was approximately 1/300". The White balance of the camera was set to cloudy because these photos were take outside. I chose to take these photos right in the middle of the action happening because that's usually when it's the hardest to take a good look of what's happening. So, I took the photo in the middle of the hair flip to be able to capture and see the most interesting point. I brought the camera close to Alyssa because I really want to get close in detail of her hair and to get a good photo. I used the rule of thirds to bring the attention to Alyssa. Alyssa was in the middle of the photo most of the time, bringing attention to her. In the photo, the background is blurred and Alyssa is in focus. The camera was brought up close to Alyssa because I wanted to get her up in focus and make the background more blurred. Alyssa's hair makes the photos more interesting by how the shape and pattern her hair is. It's interesting to see a photo like this because to capture her hair in that motion makes he photo more interested.
Motion At Home:

Motion in Black and White:
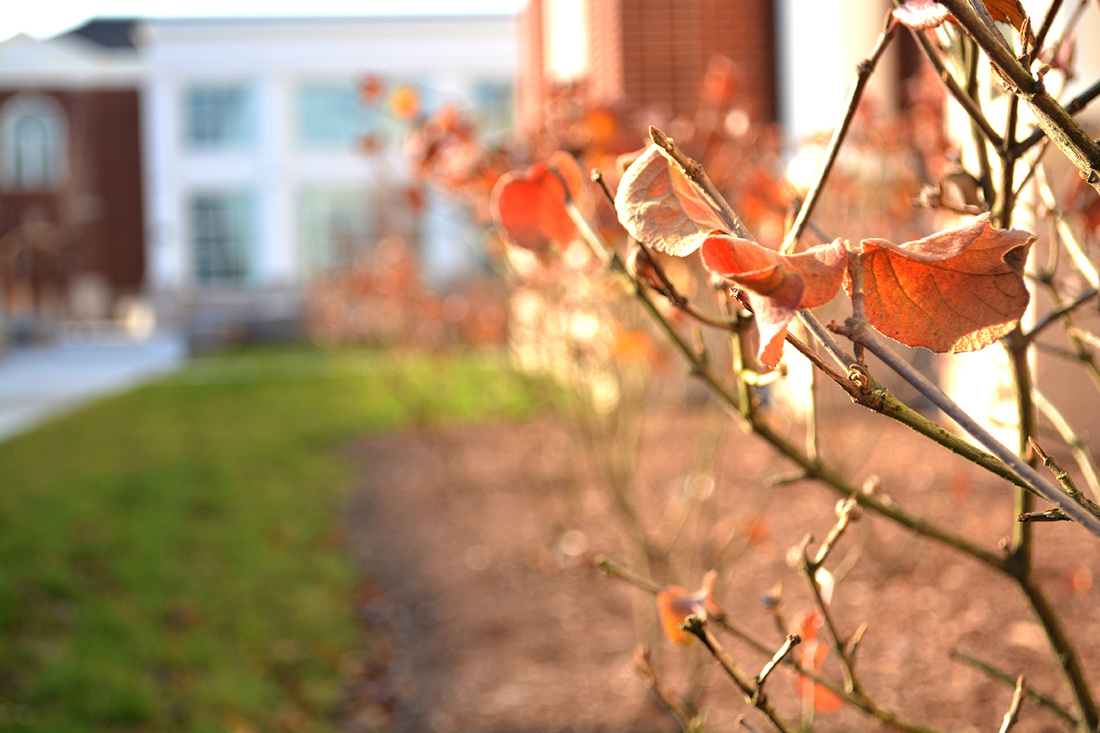
Depth of Field/Aperture
Reflection: Depth of Field in School
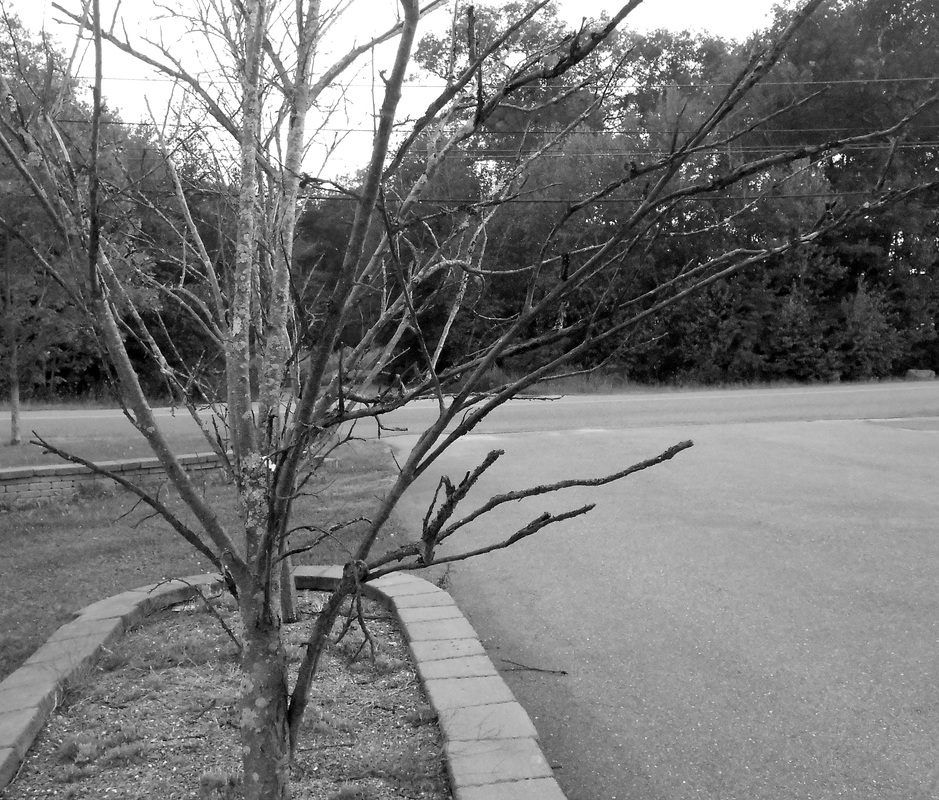
For my first photo, it was taken outside in front of the school. The f-stop in the first photo was about 4 because the branch is in focus and the lens was more open. Since it was more open, the f-stop has a lower number. The ISO was set at 100 for the first photo. The white balanced used was cloudy because the first photo was taken outside. If I were to use a point and shoot camera, I would set the camera to the setting outside and try to get as much focus on the branch as much as possible.
For my fourth photo, it has a large depth of field and it was taken in school, using the studio. The f-stop for the photo would be about 25. Since the photo is a large depth of field, everything is in focus. When everything is in focus, the lens is closed up more and not as open with shallow depth of field. The ISO setting used would be about 200-400 because the photo is bright. The white balance of the photo would be incandescent because the light source that was used was a light bulb.
The photo that I believe is better is the photo that was taken outside, in front of the school, would be the shallow depth of field photo. I personally like my shallow depth of field photos better than the large depth of field. You would want shallow depth of field because if you wanted a certain item in focus and nothing else, you should want shallow. You would want to use large depth of field when you want several items in focus or everything in the camera frame to be in focus.
Depth of Field Homework
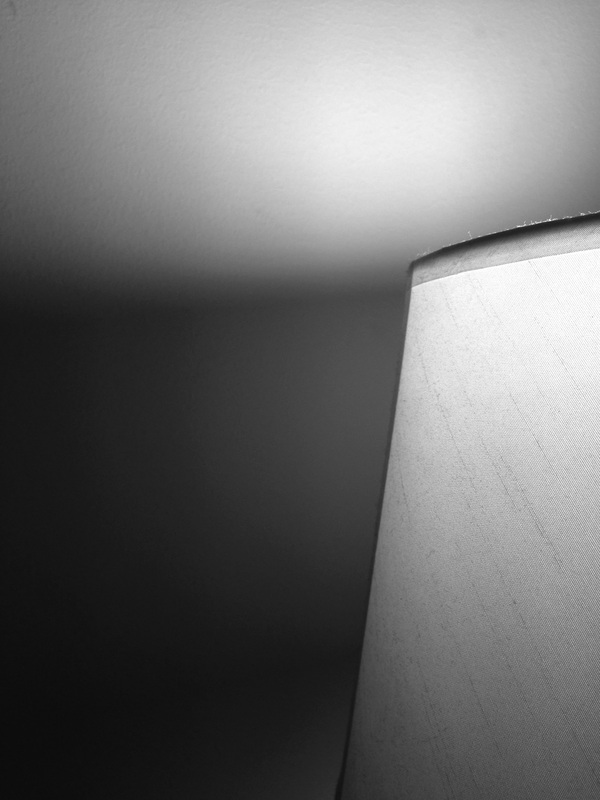
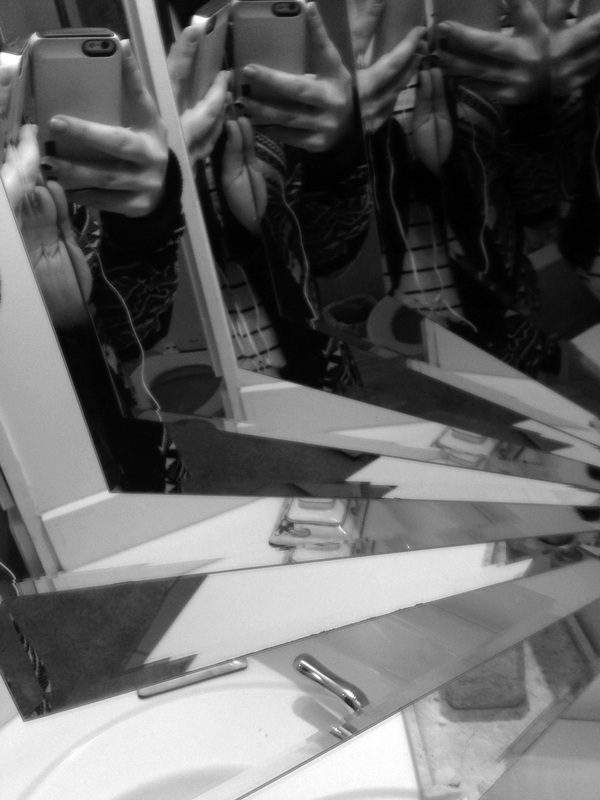
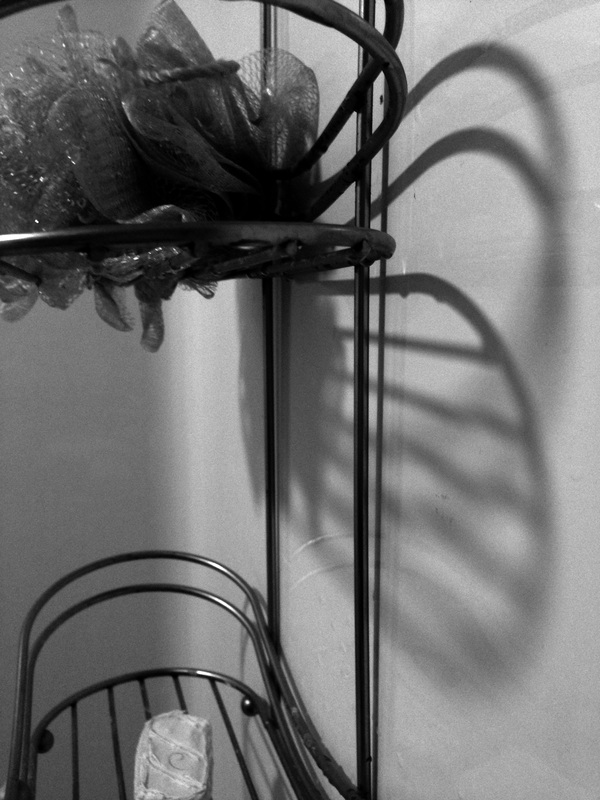
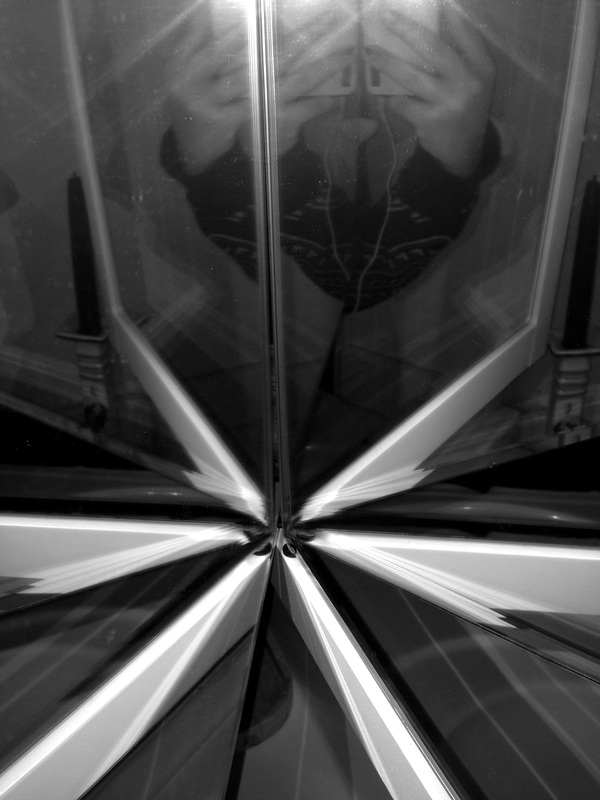
Shadow and Reflection
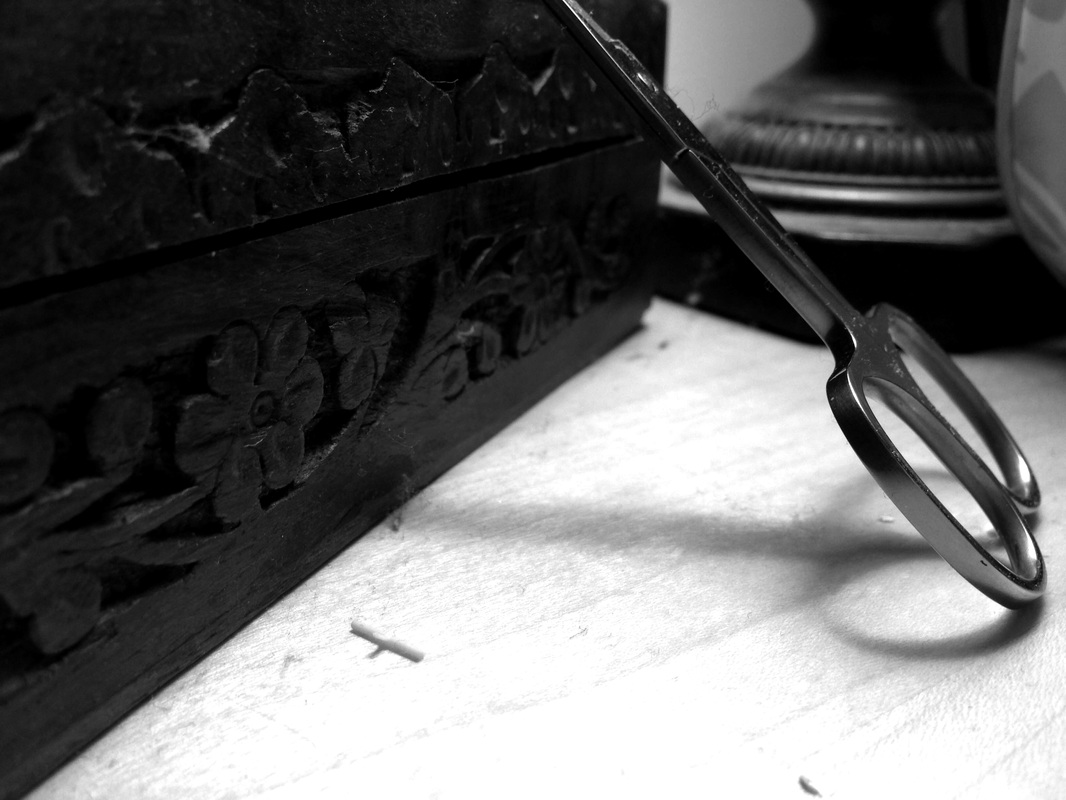

Reflection: Shadow and Reflection
When taking photos for shadow and reflection, I took all of my photos inside. I took my photos in my room and in my bathroom. For reflection photos, I took them with my phone camera and I used two mirrors to get the reflection for the third and sixth photos. Since I took these photos on my phone camera, I couldn't set the ISO setting or shutter speed. I tried to get the object(s) in focus and make sure you can see the shadows. The shadows that were created were from everyday light sources. When I took the photos for the leaning scissors, I used my lamp as the light source. When I took the fourth and fifth photos, I just the shower light that was above the shower, giving the shower rack a shadow. The positive and negative space used in the photos I would say are evened out. When taking these photos, I really wanted detail in both the object and shadow. I personally like taking photos that are close up and in focus. In my own personal opinion, I feel as if the shadows add a dark, depressing, and negative feeling towards them. When the photos are in black and white, it adds more of those feelings to the mood of the photos.
Self Portraits
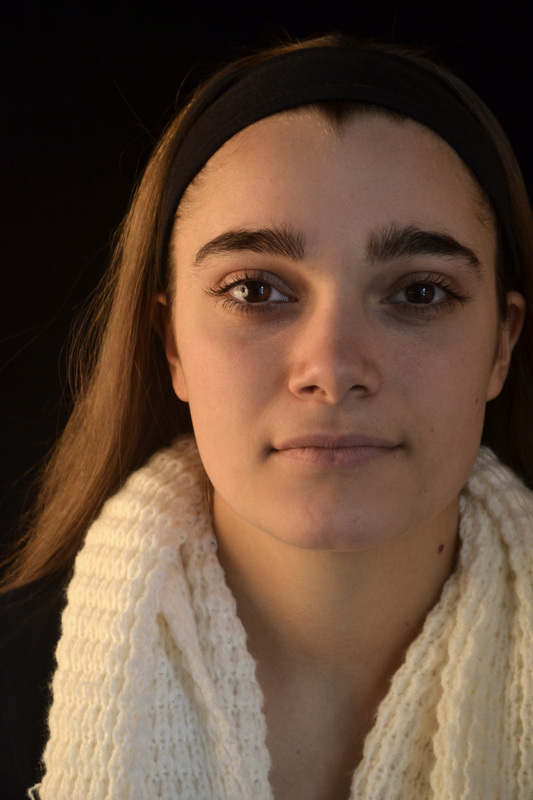

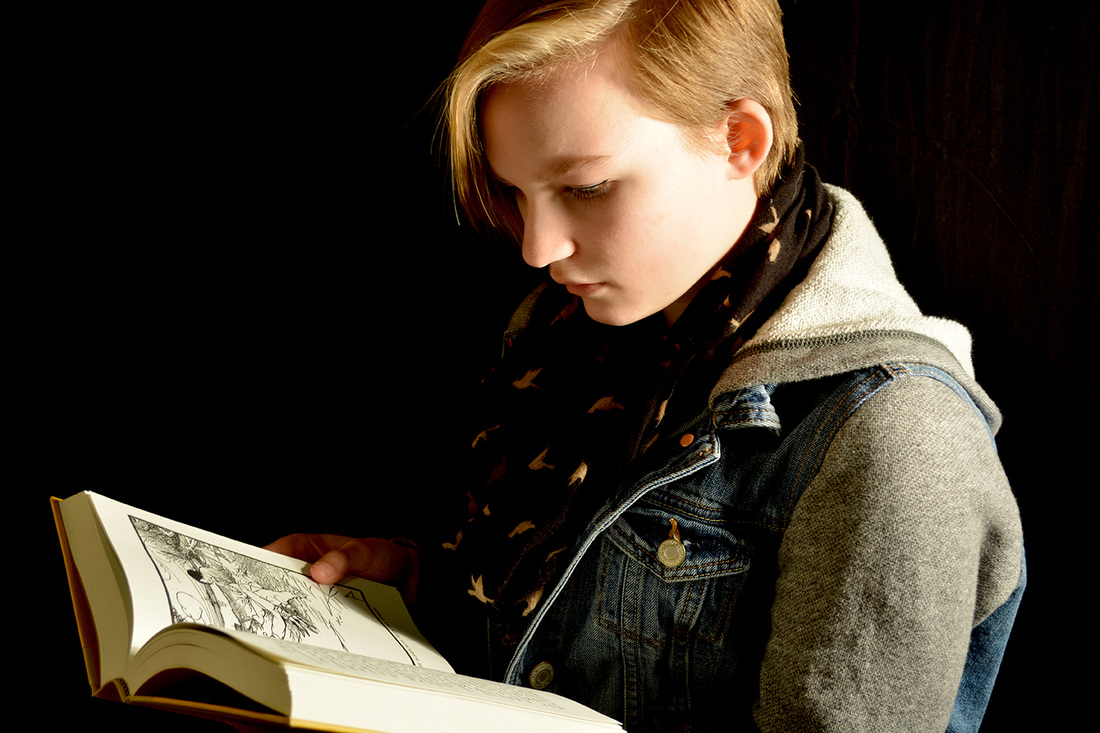
Reflection: Self Portrait
When taking some of these photos, I was holding my camera at different angles that gave each photo a different prospective. To focus on one photo, lets focus on the last photo. In the last photo, Rachel was turned down to the left, looking down at the book. I faced the camera directly at her to really show how the lighting was creating shadows. The source or the light was coming from the right and directly hitting Rachel, creating shadows on her clothes, face, and book. When taking the photo, I placed the camera horizontally so I can get most of Rachel and her upper body. When taking the photo, I was up close, but not too close to her to where I get every single detail of her. The way how Rachel and the lighting is positioned, it give Rachel a settle facial expression, noting too extreme. it simply shows her reading a book. To compare this photo with another, lets compare the fourth and sixth photo. In the fourth photo, the camera was further down and looking up to Rachel. In this photo, the lighting is coming up from both sides of her and even more higher up than usual. In this photo, Rachel was looking directly into the camera, giving it more of a intimate realtion with the viewer of photo, as if Rachel is actually looking at the viewer. Her facial expression also shows more of a fearful and tougher feeling. The shadows also casting down on her have a dark and somewhat negative contination.
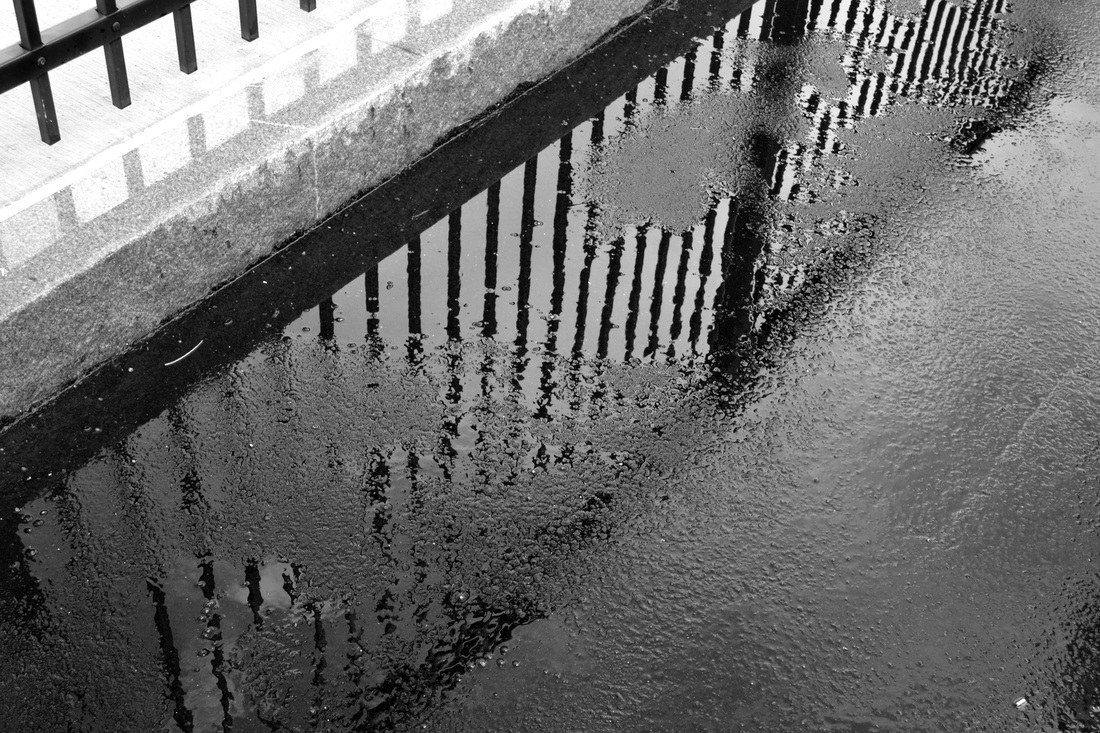
Double Exposure
Reflection: Double Exposure
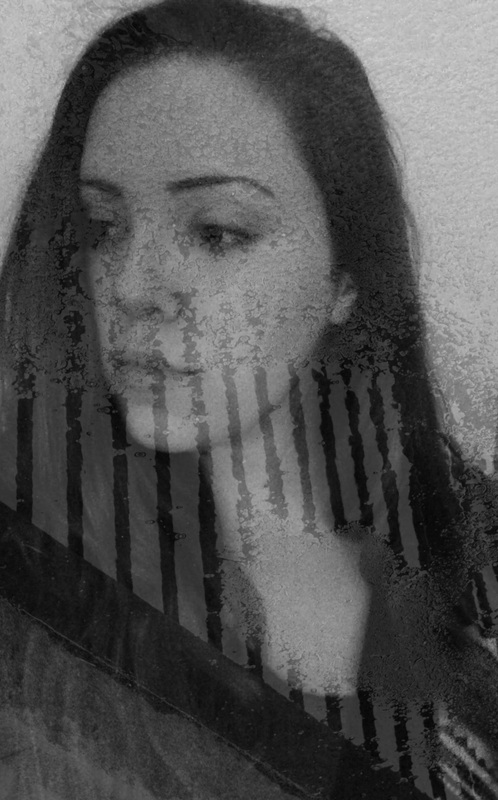
When I was deciding what photos I wanted to use for layers in double exposure, I wanted to make you think about the it and in what way can I make there two photos stand out together. The two images that I selected was one taken outside near the football field of the school. Earlier in the day, it was raining and I thought that it wold be a good idea to use this photo because in it, you can see the reflection of the fence on the ground, due to it raining earlier in the day. When using the photo for double exposure, I flipped the photo so The lines of the fence somewhat faded up into my face for the other photo. When editing the photos, I converted them both to black and white so they would fit in evenly. Also, I made the fence photo the to layer so I can fade each of the photos into each other.
Letter Form